How to build a price tracker with Crawlee and Apify

Build a price tracker with Crawlee for Python to scrape product details, export data in multiple formats, and send email alerts for price drops, then deploy and schedule it as an Apify Actor.
![]()
In this tutorial, we’ll build a price tracker using Crawlee for Python and Apify. By the end, you’ll have an Apify Actor that scrapes product details from a webpage, exports the data in various formats (CSV, Excel, JSON, and more), and sends an email alert when the product’s price falls below your specified threshold.
1. Project Setup
Our first step is to install the Apify CLI. You can do this using either Homebrew or NPM with the following commands: s
Homebrew
brew install apify-cli
Via NPM
npm -g install apify-cli
Next, let’s run the following commands to use one of Apify’s pre-built templates. This will streamline the setup process and get us coding right away:
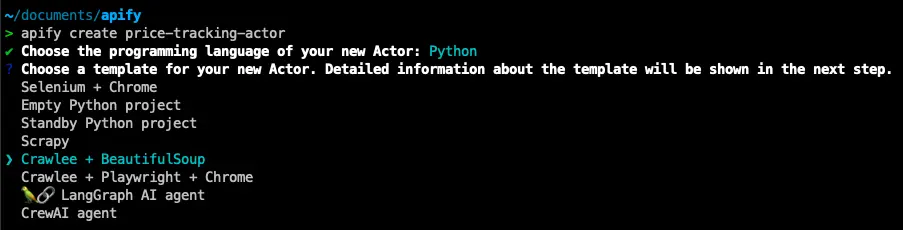
apify create price-tracking-actor
A dropdown list will appear. To follow along with this tutorial, select Python and Crawlee + BeautifulSoup template. Once the template is installed, navigate to the newly created folder and open it in your preferred IDE.
Navigate to src/main.py in your project, and you’ll find that a significant amount of boilerplate code has already been generated for you. If you’re new to Apify or Crawlee, don’t worry, it’s not as complex as it might seem. This pre-written code is designed to save you time and jumpstart your development process.
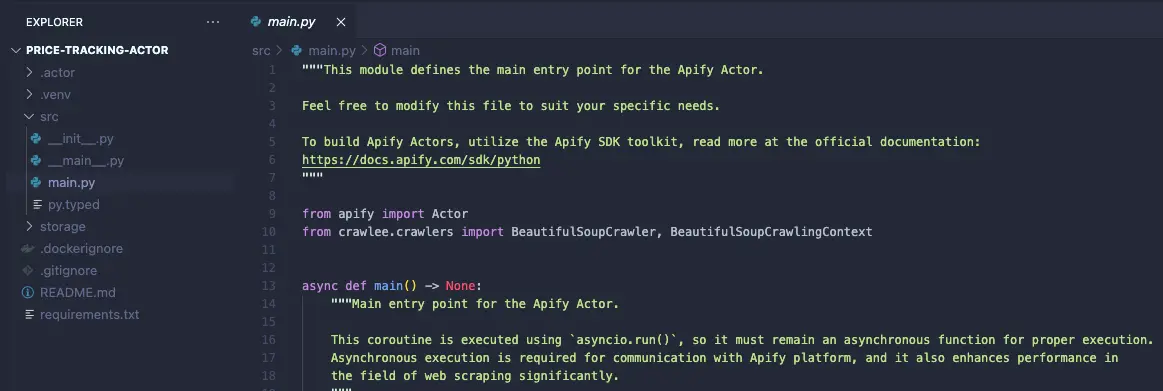
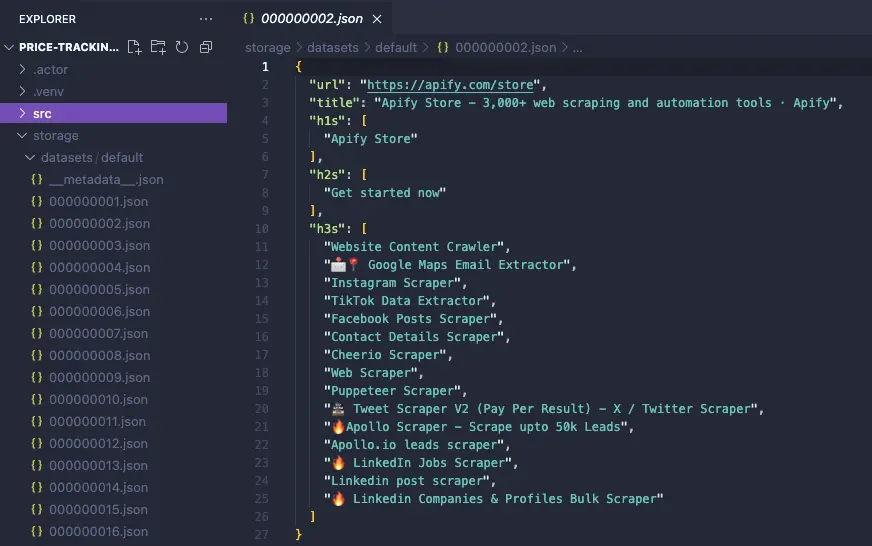
In fact, this template comes with fully functional code that scrapes the Apify homepage. To test it out, simply run the command apify run. Within a few seconds, you’ll see the storage/datasets directory populate with the scraped data in JSON format.
2. Customizing the template
Now that our project is set up, let’s customize the template to scrape our target website: Raspberry Pi 5 (8GB RAM) on Central Computer.
First, on the src/main.py file, go to the crawler.run(start_urls) and replace it with the URL for the target website, as shown below:
await crawler.run(['https://www.centralcomputer.com/raspberry-pi-5-8gb-ram-board.html'])
Normally, you could let users specify a URL through the Actor input, and the Actor would prioritize it. However, since we’re scraping a specific page, we’ll just use the hardcoded URL for simplicity. Keep in mind that dynamic input is still an option if you want to make the Actor more flexible later.
Extracting the Product’s Name and Price
Finally, let’s modify our template to extract key elements from the page, such as the product name and price.
Starting with the product name, inspect the target page using DevTools to find suitable selectors for targeting the element.
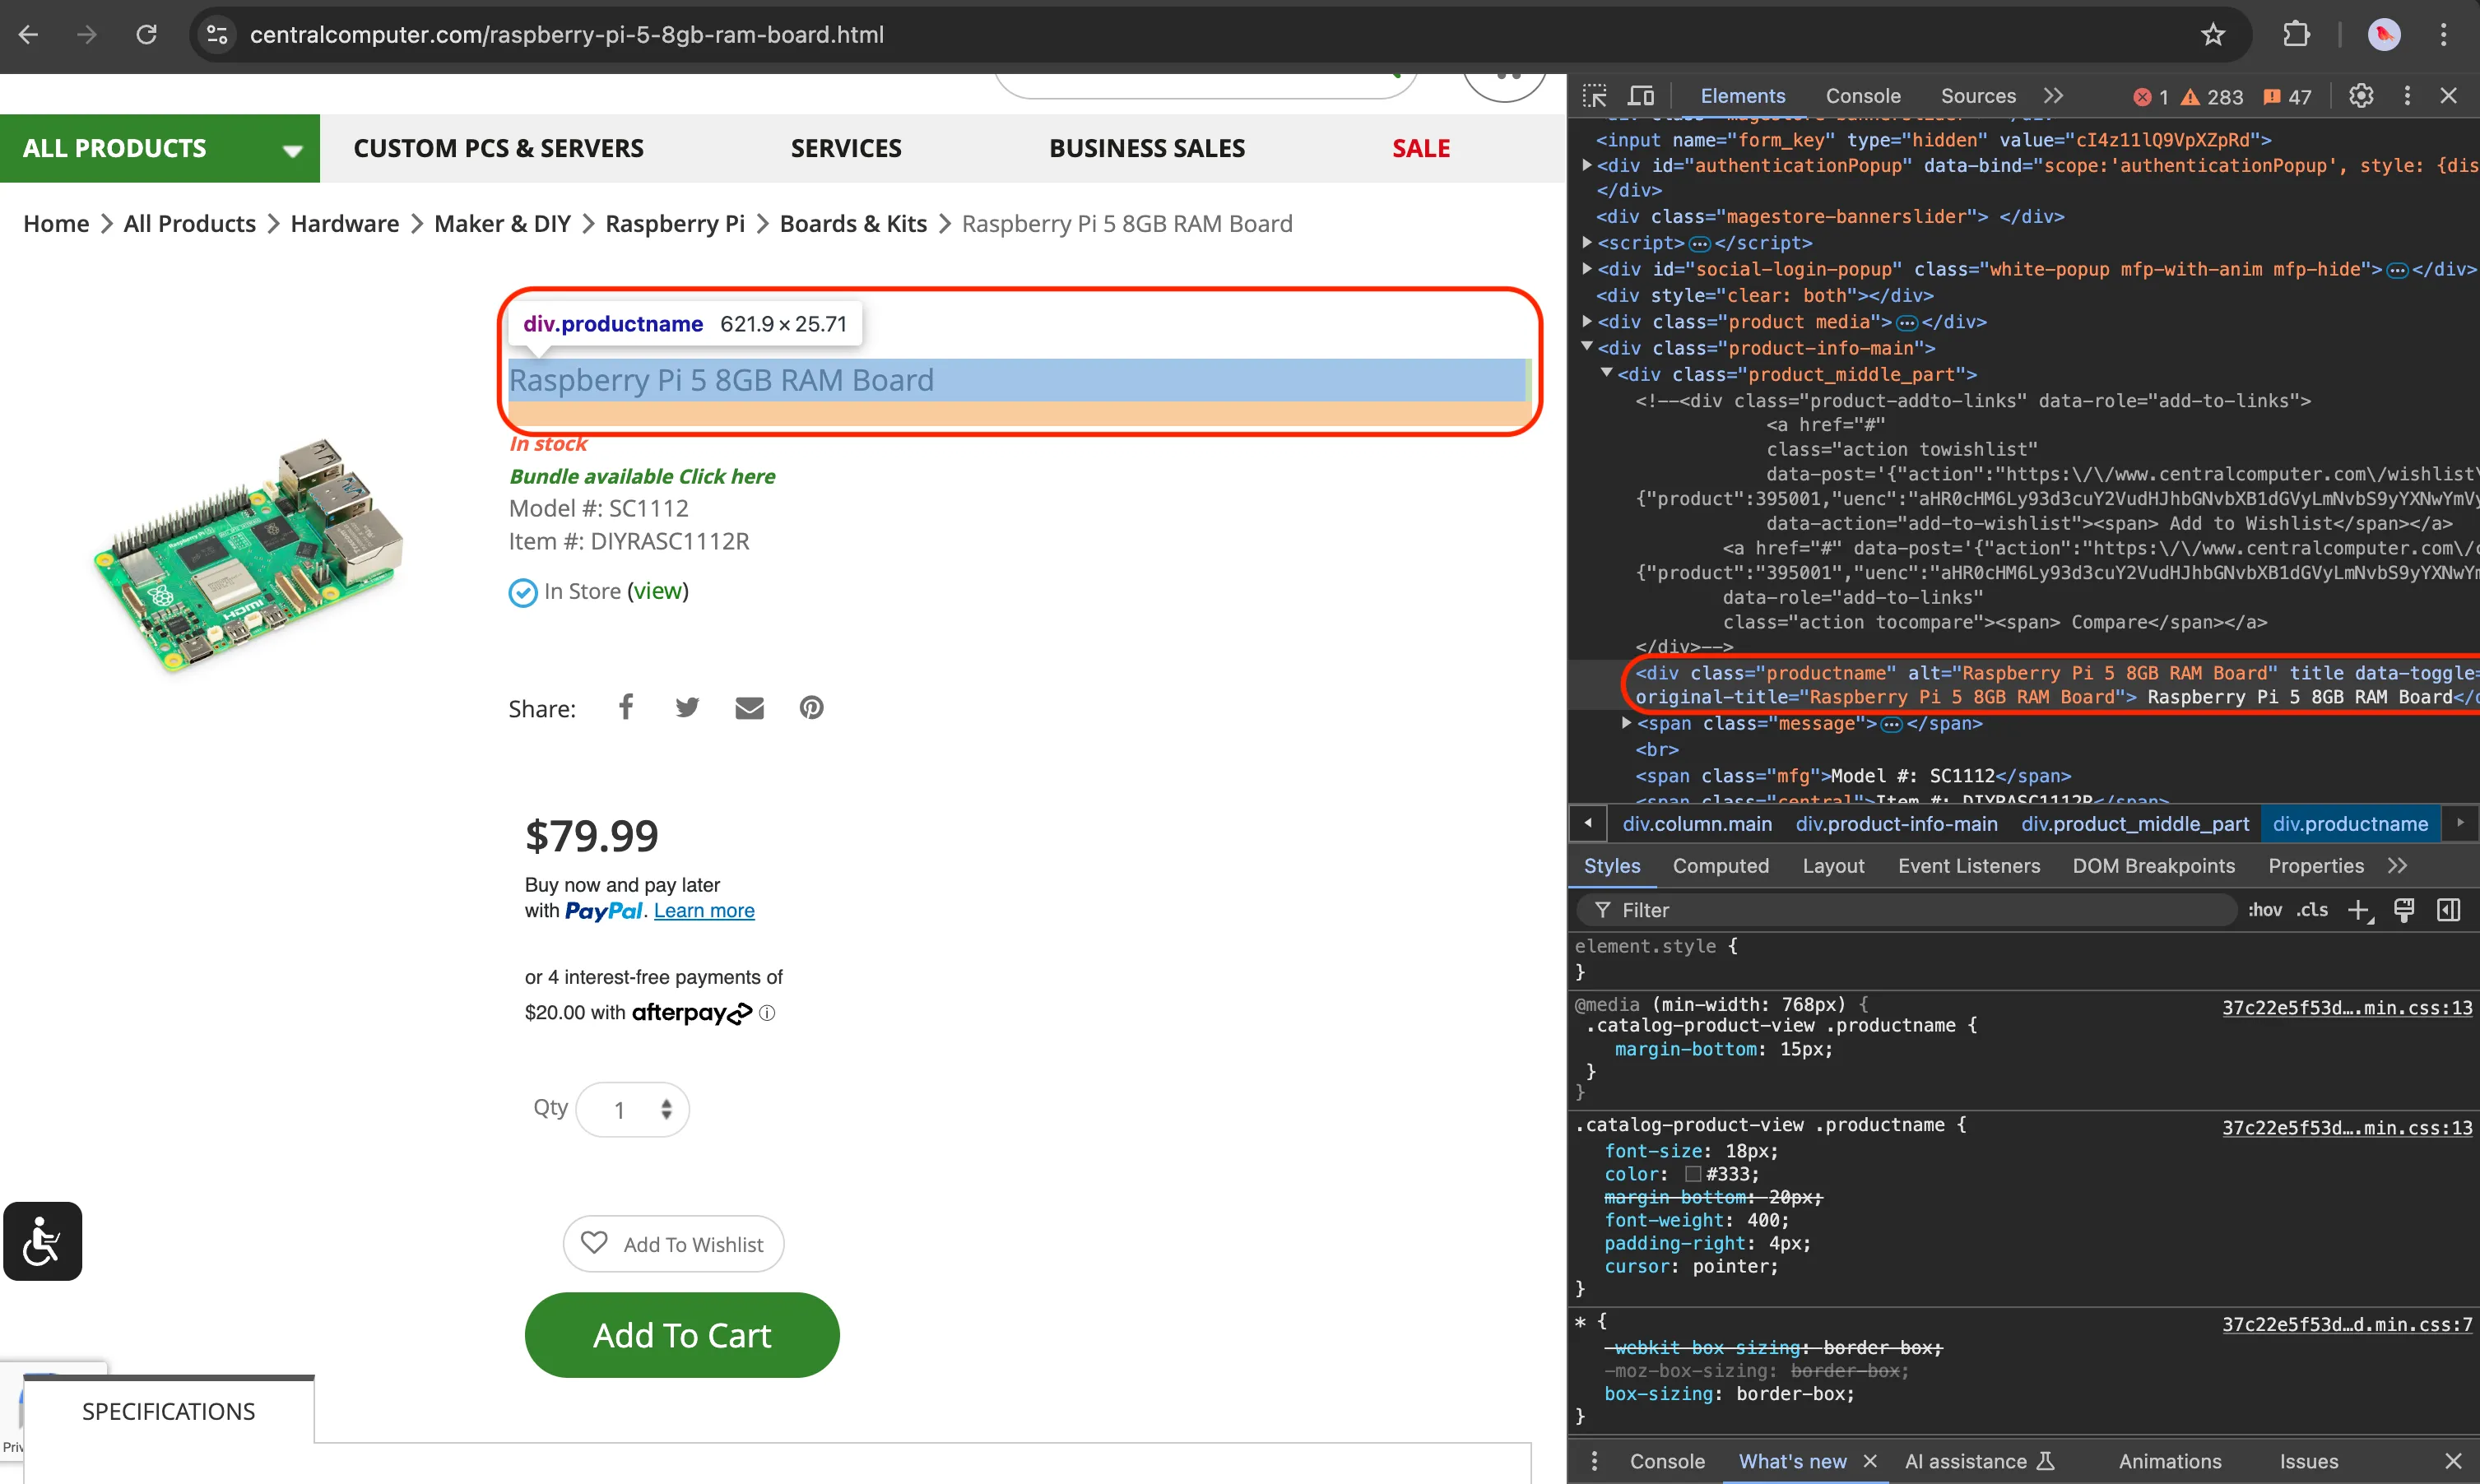
Next, create a product_name_element variable to hold the element selected with the CSS selectors found on the page and update the data dictionary with the element’s text contents. Also, remove the line of code that previously made the Actor crawl the Apify website, as we now want it to scrape only a single page.
Your request_handler function should look similar to the example below:
@crawler.router.default_handler
async def request_handler(context: BeautifulSoupCrawlingContext) -> None:
    url = context.request.url
    Actor.log.info(f'Scraping {url}...')

    # Select the product name and price elements.
    product_name_element = context.soup.find('div', class_='productname')

    # Extract the desired data.
    data = {
        'url': context.request.url,
        'product_name': product_name_element.text.strip() if product_name_element else None,
    }

    # Store the extracted data to the default dataset.
    await context.push_data(data)

    # Enqueue additional links found on the current page.
    # await context.enqueue_links() -> REMOVE THIS LINE
It’s a good practice to test our code after every significant change to ensure it works as expected.
Run apify run again, but this time, add the –-purge flag to prevent the newly scraped data from mixing with previous runs:
apify run --purge
Navigate to storage/datasets, and you should find a file with the scraped content:
{
    "url": "https://www.centralcomputer.com/raspberry-pi-5-8gb-ram-board.html",
    "product_name": "Raspberry Pi 5 8GB RAM Board"}
}
Now that you’ve got the hang of it, let’s do the same thing for the price: 79.99.
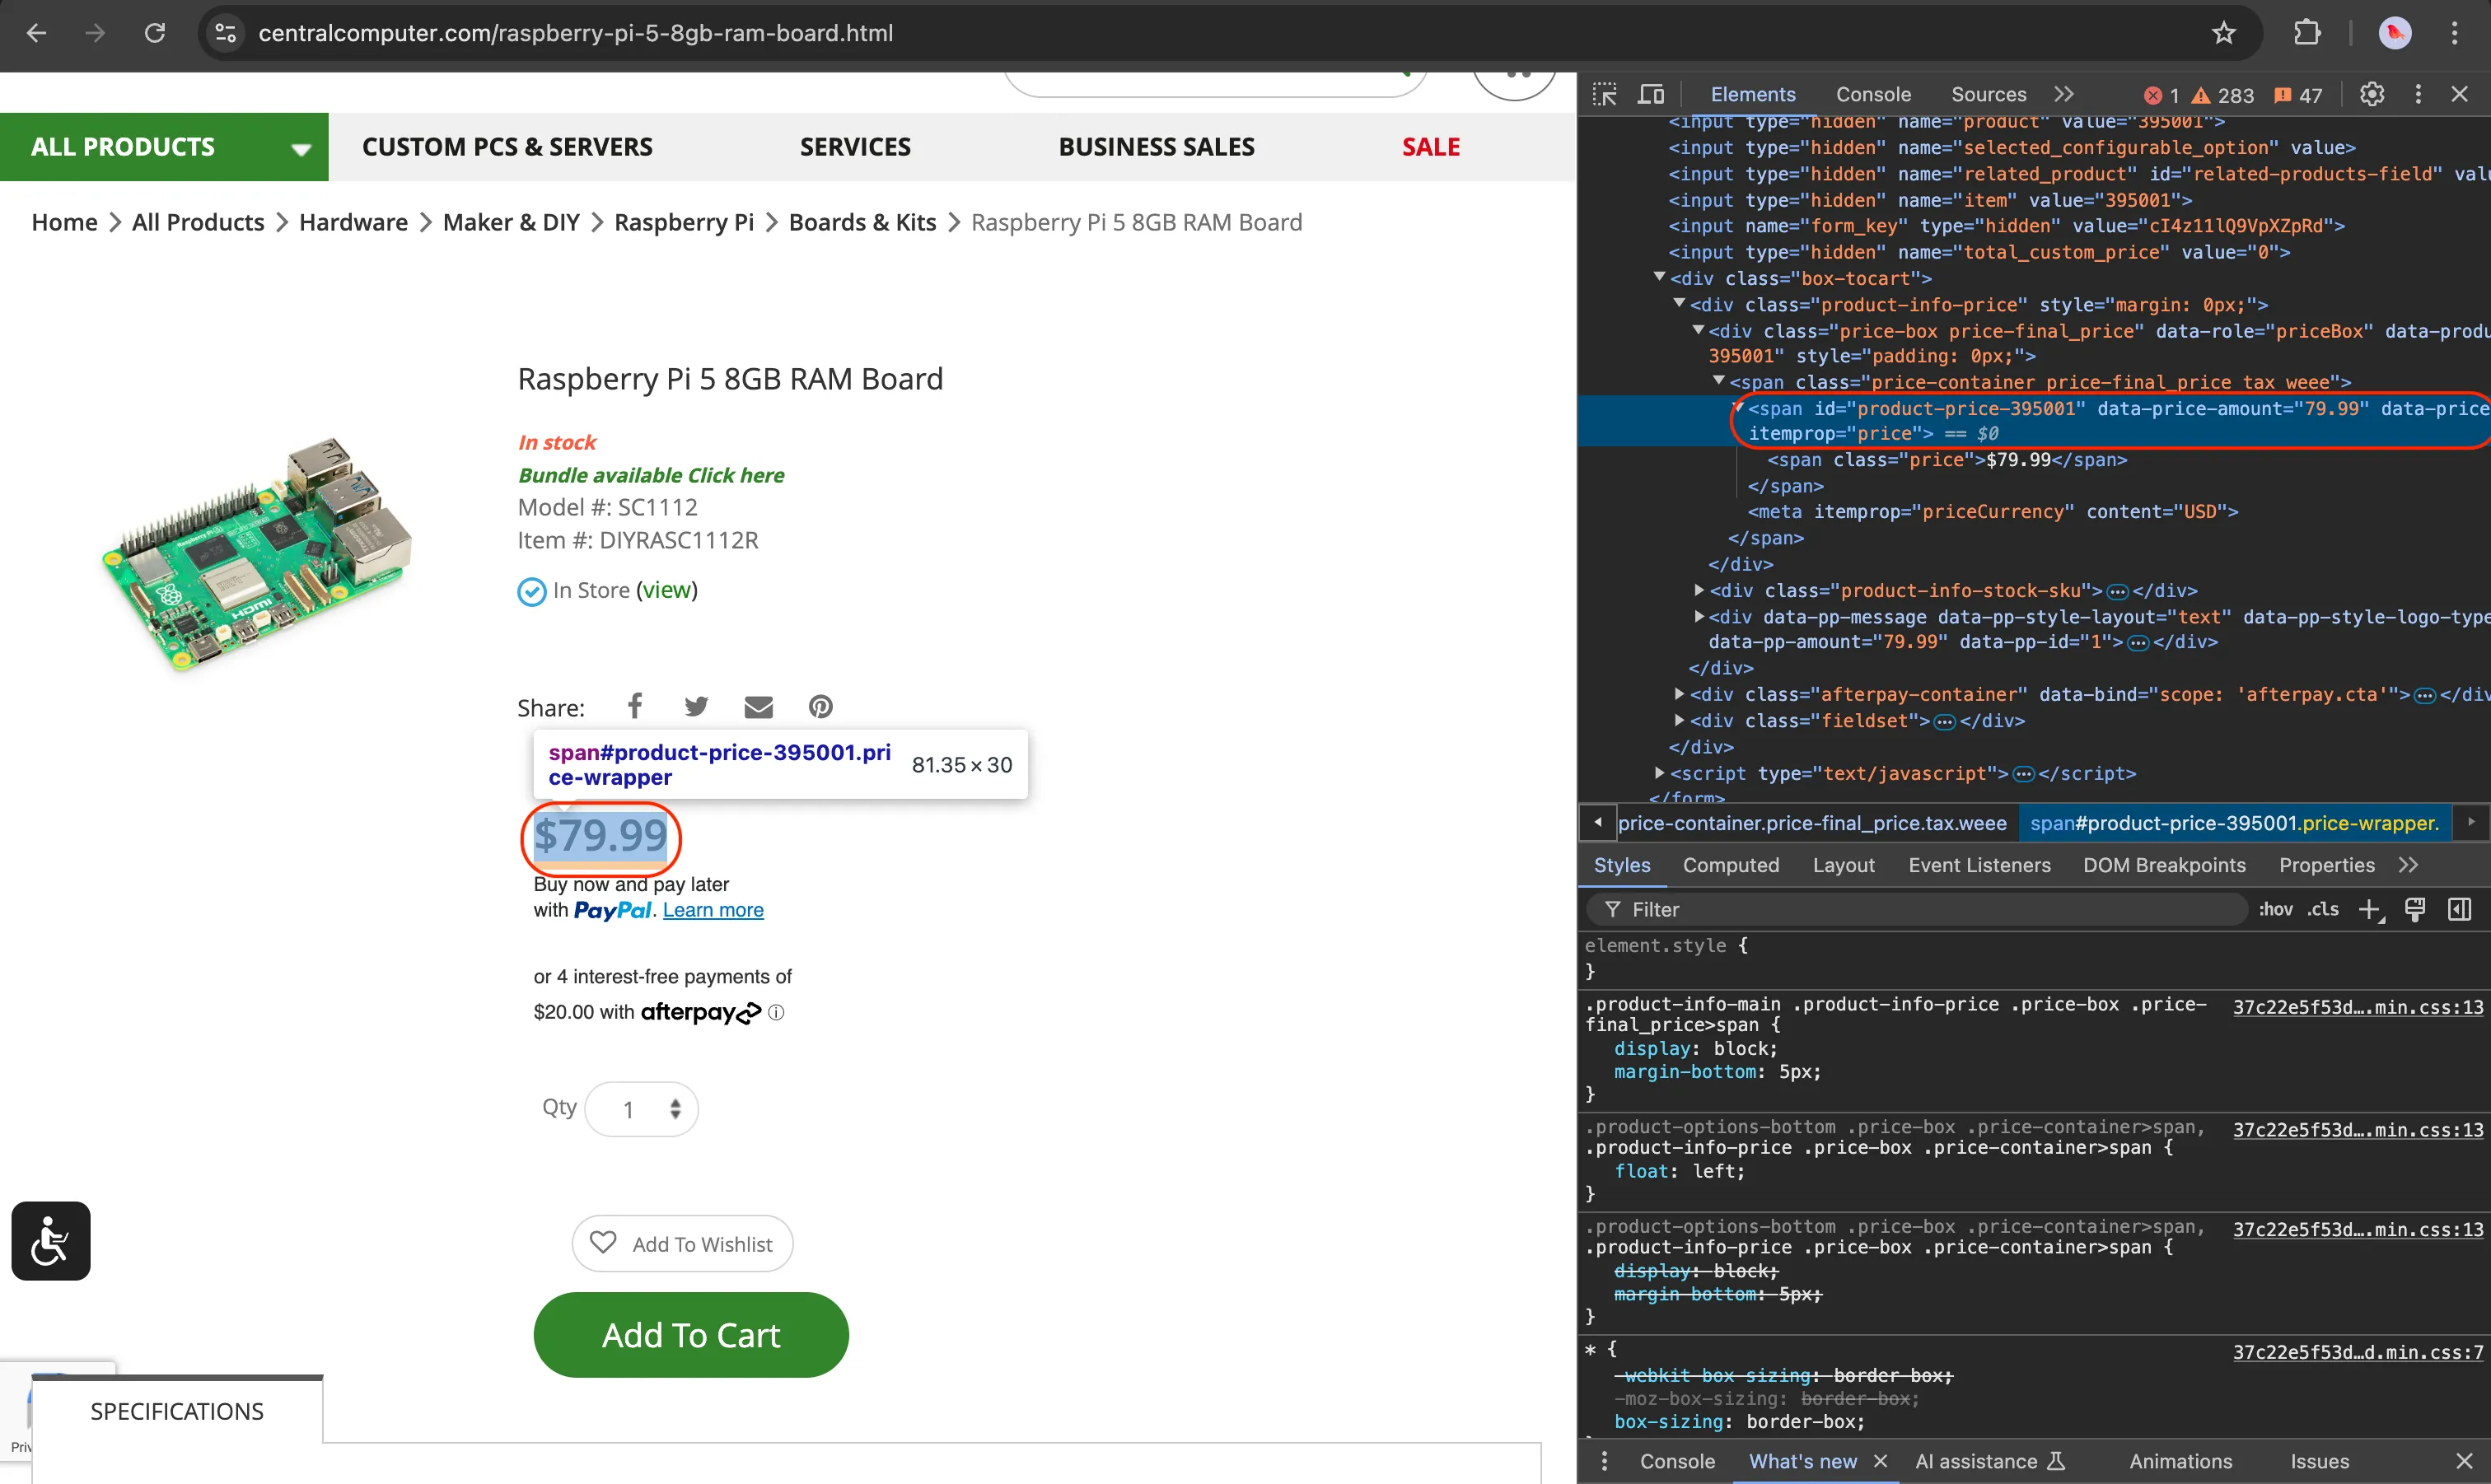
In the code below, you’ll notice a slight difference: instead of extracting the element’s text content, we’re retrieving the value of its data-price-amount attribute. This approach avoids capturing the dollar sign ($) that would otherwise come with the text.
If you prefer working with text content instead, that’s perfectly fine, you can simply use .replace('$', '') to remove the dollar sign.
Also, keep in mind that the extracted price will be a string by default. To perform numerical comparisons, we need to convert it to a float. This conversion will allow us to accurately compare the price values later on.
Here’s how the updated code looks so far:
# main.py

# ...previous code

@crawler.router.default_handler
async def request_handler(context: BeautifulSoupCrawlingContext) -> None:
    url = context.request.url
    Actor.log.info(f'Scraping {url}...')

    # Select the product name and price elements.
    product_name_element = context.soup.find('div', class_='productname')
    product_price_element = context.soup.find('span', id='product-price-395001')

    # Extract the desired data.
    data = {
        'url': context.request.url,
        'product_name': product_name_element.text.strip() if product_name_element else None,
        'price': float(product_price_element['data-price-amount']) if product_price_element else None,
    }

    # Store the extracted data to the default dataset.
    await context.push_data(data)
Again, try running it with apify run --purge and check if you get a similar output as the example below:
{
    "url": "https://www.centralcomputer.com/raspberry-pi-5-8gb-ram-board.html",
    "product_name": "Raspberry Pi 5 8GB RAM Board",
    "price": 79.99
}
That’s it for the extraction part! Below is the complete code we’ve written so far.
💡 TIP: If you’d like to get some more practice, try scraping additional elements such as the
model,Item #, orstock availability (In stock).
# main.py

from apify import Actor
from crawler.crawlers import BeautifulSoupCrawler, BeautifulSoupCrawlingContext


async def main() -> None:

    # Enter the context of the Actor.
    async with Actor:
        # Create a crawler.
        crawler = BeautifulSoupCrawler(
            # Limit the crawl to max requests. Remove or increase it for crawling all links.
            max_requests_per_crawl=50,
        )

        # Define a request handler, which will be called for every request.
        @crawler.router.default_handler
        async def request_handler(context: BeautifulSoupCrawlingContext) -> None:
            url = context.request.url
            Actor.log.info(f'Scraping {url}...')

            # Select the product name and price elements.
            product_name_element = context.soup.find('div', class_='productname')
            product_price_element = context.soup.find('span', id='product-price-395001')

            # Extract the desired data.
            data = {
                'url': context.request.url,
                'product_name': product_name_element.text.strip() if product_name_element else None,
                'price': float(product_price_element['data-price-amount']) if product_price_element else None,
            }

            # Store the extracted data to the default dataset.
            await context.push_data(data)

        # Run the crawler with the starting requests.
        await crawler.run(['https://www.centralcomputer.com/raspberry-pi-5-8gb-ram-board.html'])
3. Sending an Email Alert
From this point forward, you’ll need an Apify account. You can create one for free here.
We need an Apify account because we’ll be making an API call to a pre-existing Actor from the Apify Store, the “Send Email Actor”, to handle notifications. Apify’s email system takes care of sending alerts, so we don’t have to worry about handling 2FA in our automation.
# main.py

# ...previous code

# Define a price threshold
price_threshold = 80

# Call the "Send Email" Actor when the price goes below the threshold
if data['price'] < price_threshold:
    actor_run = await Actor.start(
        actor_id="apify/send-mail",
        run_input={
            "to": "your_email@email.com",
            "subject": "Python Price Alert",
            "text": f"The price of '{data['product_name']}' has dropped below ${price_threshold} and is now ${data['price']}.\n\nCheck it out here: {data['url']}",
        },
    )
    Actor.log.info(f"Email sent with run ID: {actor_run.id}")
In the code above, we’re using the Apify Python SDK, which is already included in our project, to call the “Send Email” Actor with the required input.
To make this API call work, you’ll need to log in to your Apify account from the terminal using your APIFY_API_TOKEN.
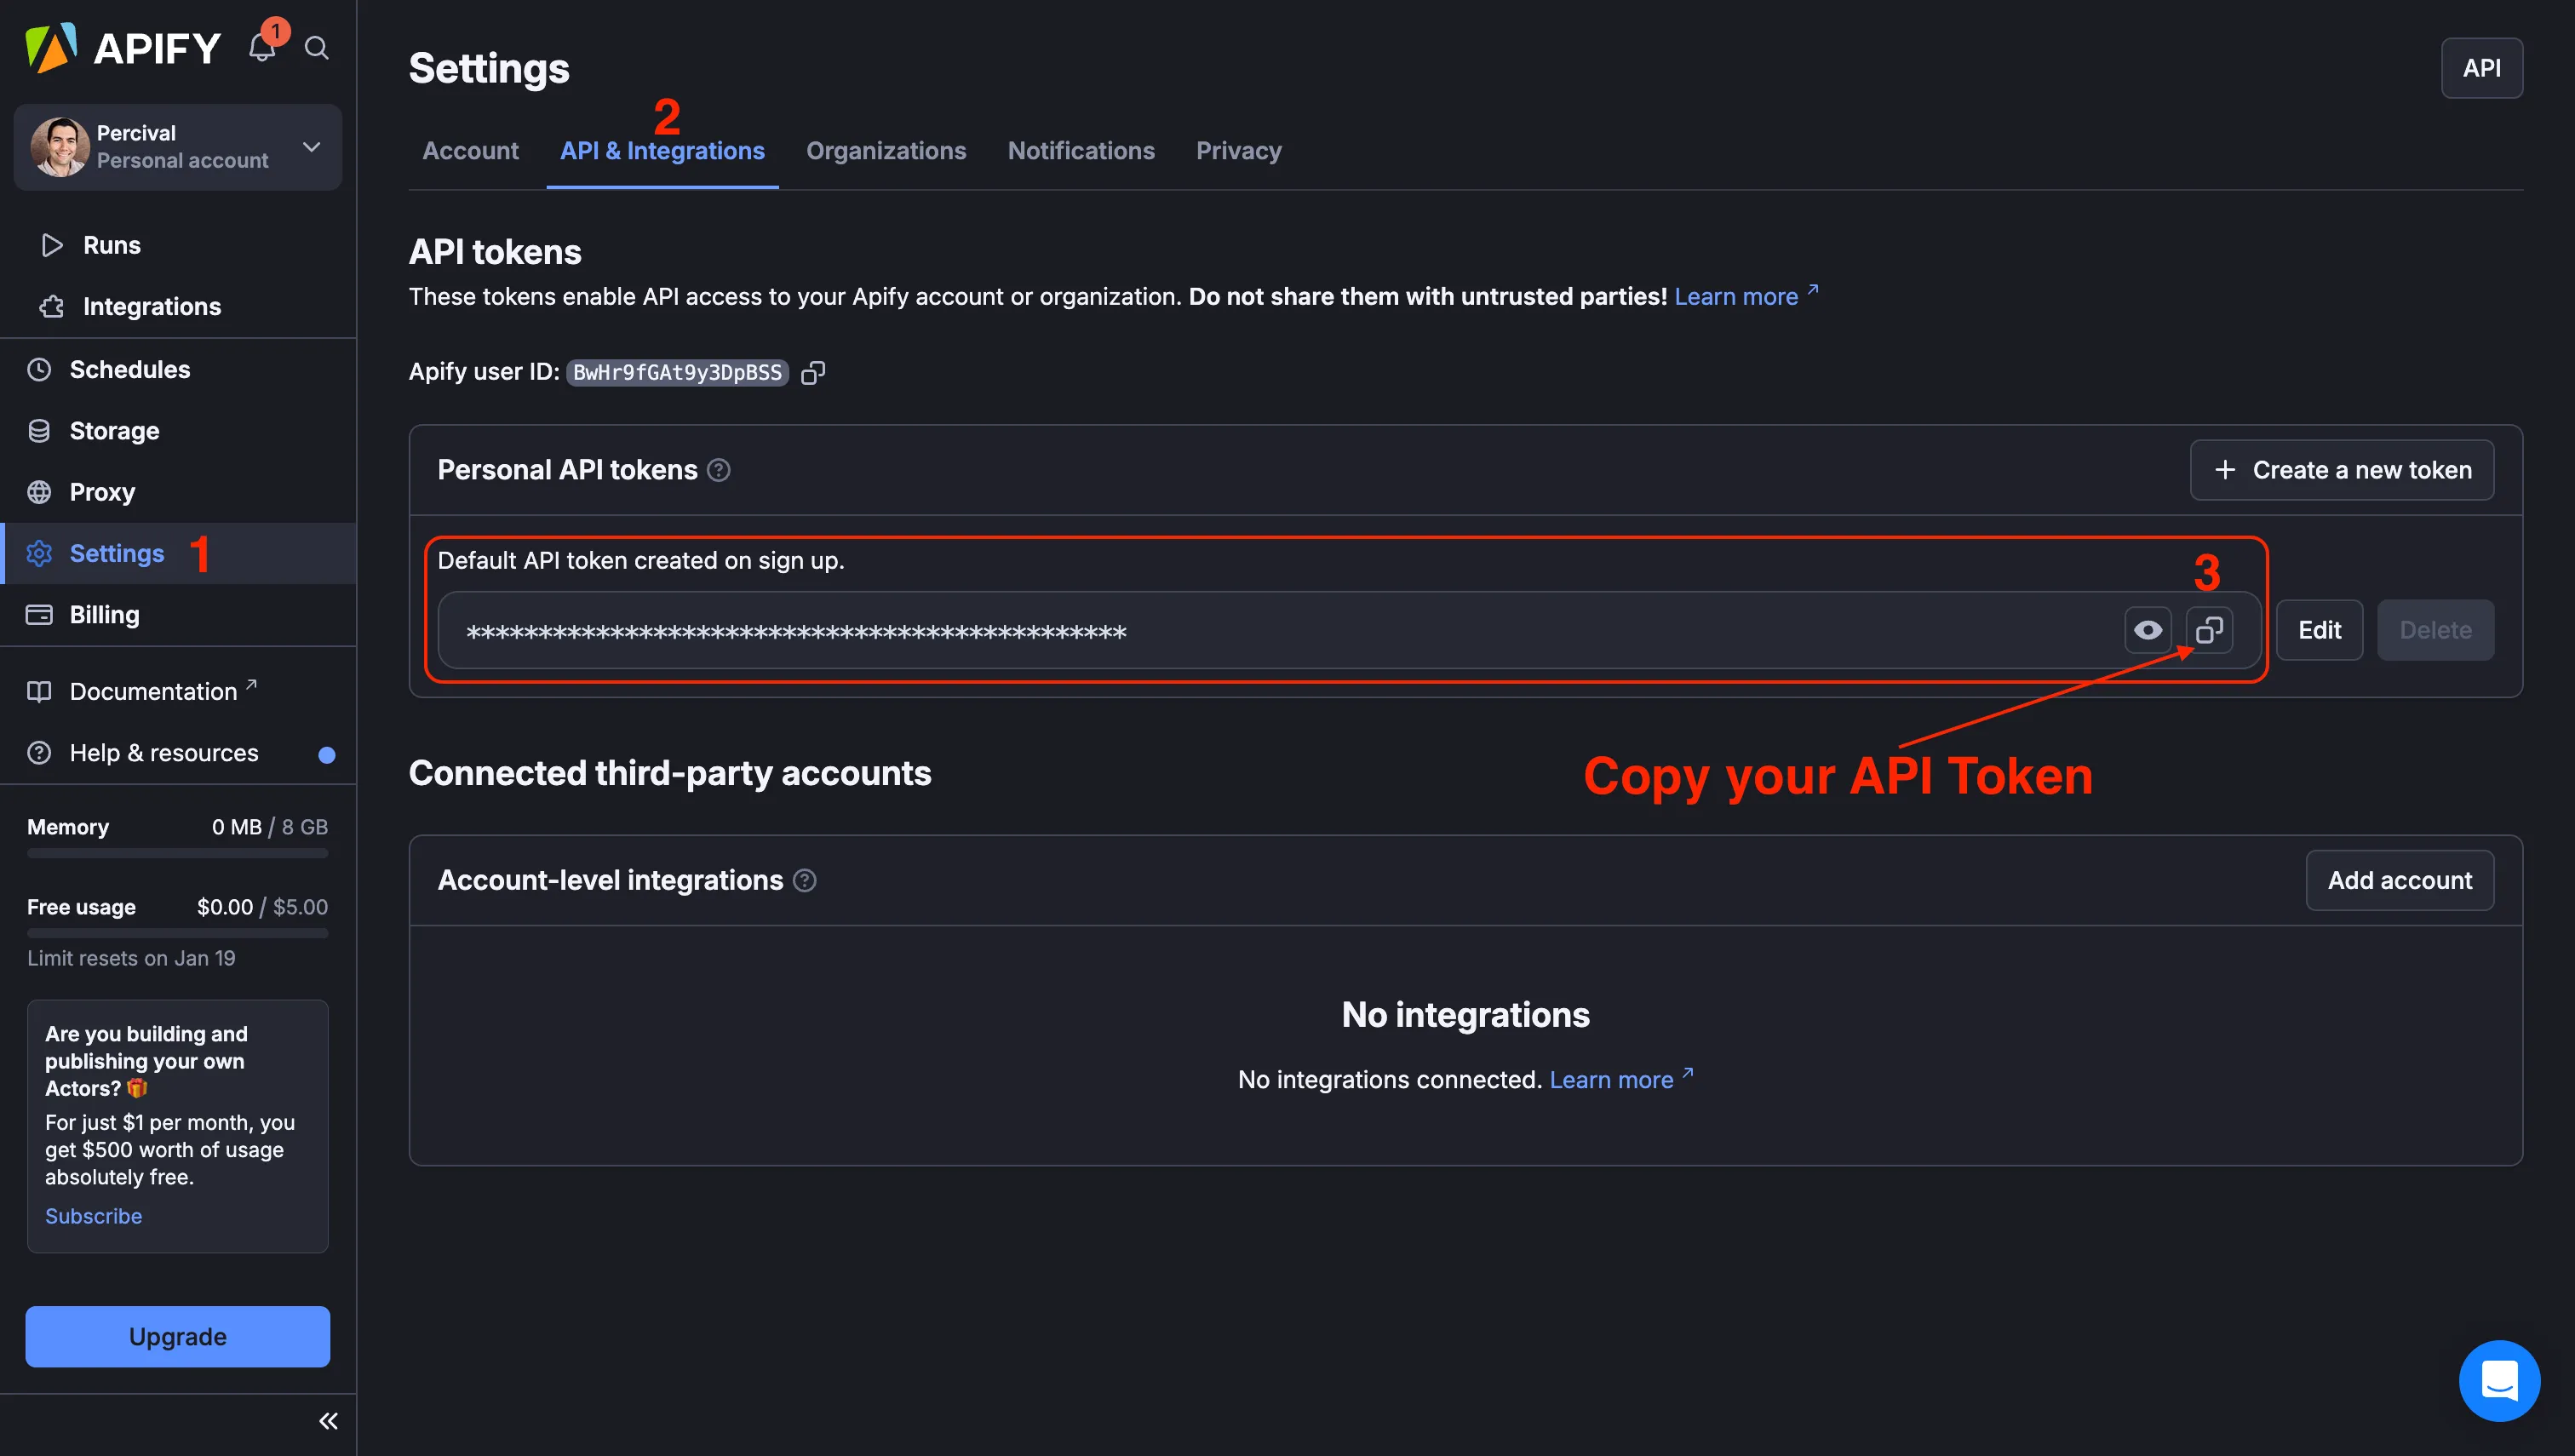
To get your APIFY_API_TOKEN, sign up for an Apify account, then navigate to Settings → API & Integrations, and copy your Personal API token.
Next, enter the following command in the terminal inside your Price Tracking Project:
apify login
Select Enter API Token Manually , paste the token you copied from your account and hit enter.

You’ll see a confirmation that you’re now logged into your Apify account. When you run the code, the API token will be automatically inferred from your account, allowing you to use the Send Email Actor.
If you encountered any issues, double-check that your code matches the one below:
from apify import Actor
from crawlee.crawlers import BeautifulSoupCrawler, BeautifulSoupCrawlingContext


async def main() -> None:

    # Enter the context of the Actor.
    async with Actor:
        # Create a crawler.
        crawler = BeautifulSoupCrawler(
            # Limit the crawl to max requests. Remove or increase it for crawling all links.
            max_requests_per_crawl=50,
        )

        # Define a request handler, which will be called for every request.
        @crawler.router.default_handler
        async def request_handler(context: BeautifulSoupCrawlingContext) -> None:
            url = context.request.url
            Actor.log.info(f'Scraping {url}...')

            # Select the product name and price elements.
            product_name_element = context.soup.find('div', class_='productname')
            product_price_element = context.soup.find('span', id='product-price-395001')

            # Extract the desired data.
            data = {
                'url': context.request.url,
                'product_name': product_name_element.text.strip() if product_name_element else None,
                'price': float(product_price_element['data-price-amount']) if product_price_element else None,
            }

            price_threshold = 80

            if data['price'] < price_threshold:
                actor_run = await Actor.start(
                    actor_id="apify/send-mail",
                    run_input={
                        "to": "your_email@gmail.com",
                        "subject": "Python Price Alert",
                        "text": f"The price of '{data['product_name']}' has dropped below ${price_threshold} and is now ${data['price']}.\n\nCheck it out here: {data['url']}",
                    },
                )
                Actor.log.info(f"Email sent with run ID: {actor_run.id}")

            # Store the extracted data to the default dataset.
            await context.push_data(data)

        # Run the crawler with the starting requests.
        await crawler.run(['https://www.centralcomputer.com/raspberry-pi-5-8gb-ram-board.html'])
🔖 Replace the placeholder email address with your actual email, the one where you want to receive notifications. Make sure it matches the email you used to register your Apify account.
Then, run the code using:
apify run --purge
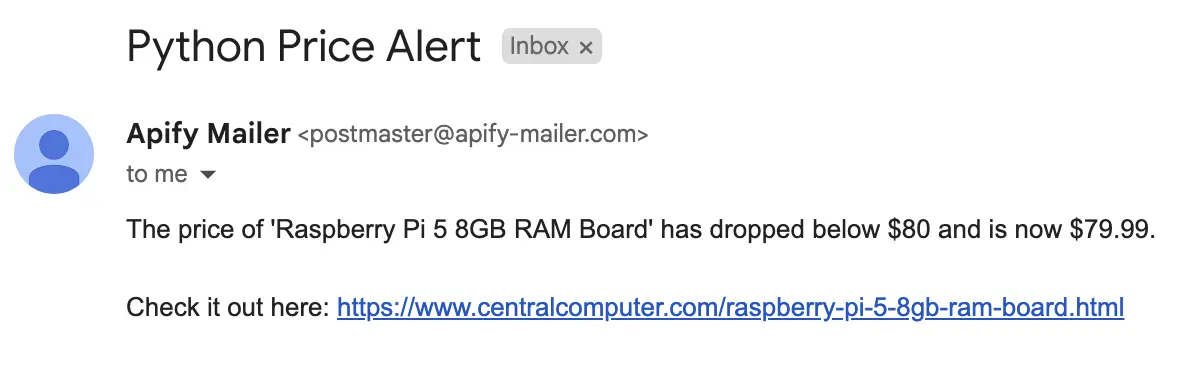
If everything works correctly, you should receive an email like the one below in your inbox.
4. Deploying your Actor
It’s time to deploy your Actor to the cloud, allowing it to take full advantage of the Apify Platform’s features.
Fortunately, this process is incredibly simple. Since you’re already logged into your account, just run the following command:
apify push
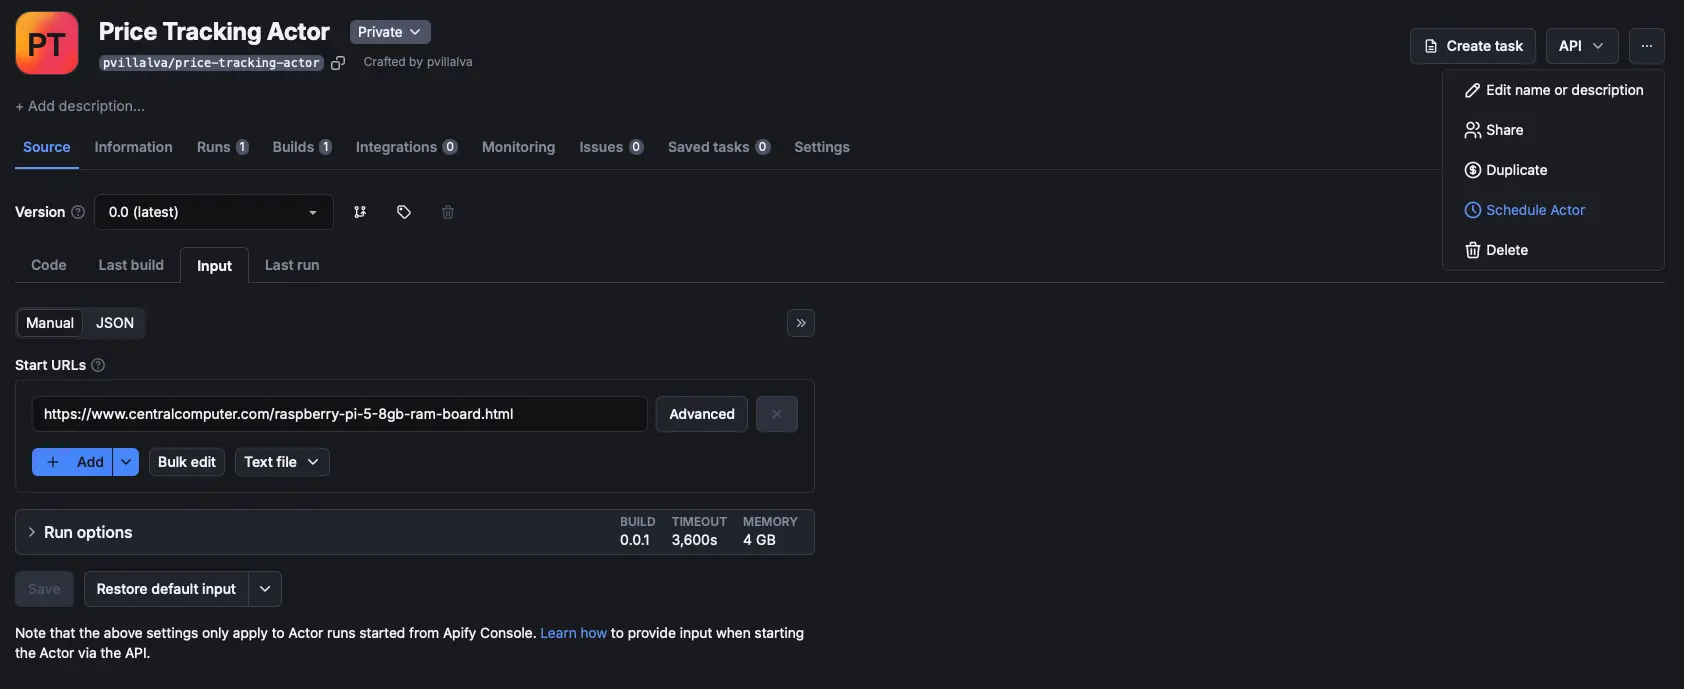
In just a few seconds, you’ll find your newly created Actor in your Apify account by navigating to Actors → Development → Price Tracking Actor.
![]()
Note that the Start URLs input has been reset to apify.com, so be sure to replace it with our target website:
https://www.centralcomputer.com/raspberry-pi-5-8gb-ram-board.html
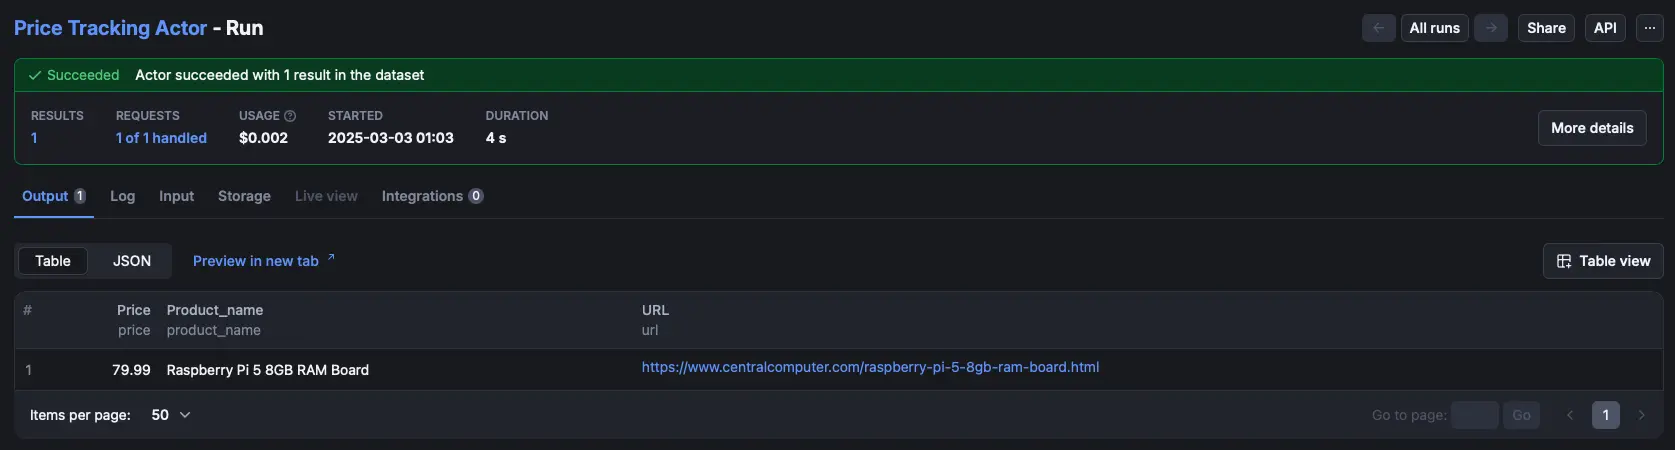
Once updated, click the green Save & Start button at the bottom of the page to run your Actor.
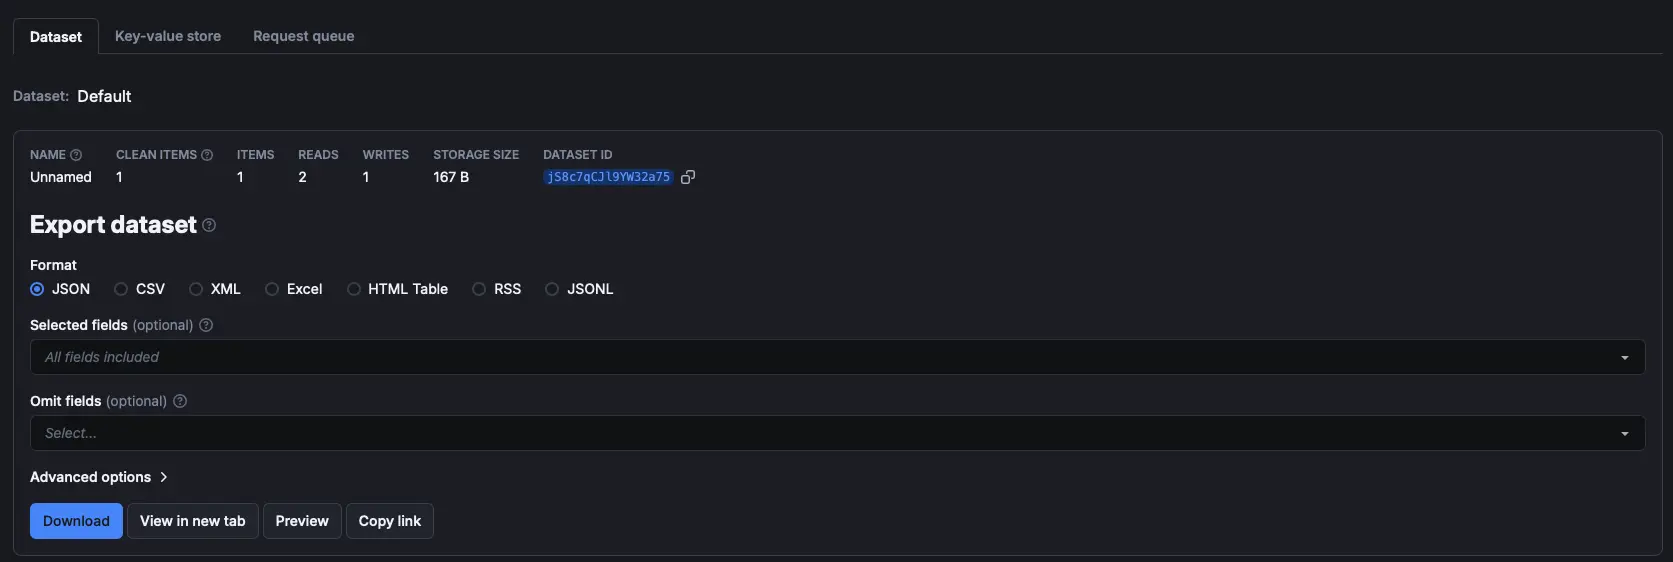
After the run completes, you’ll see a preview of the results in the Output tab. You can also export your data in multiple formats from the Storage tab.
Export dataset:
5. Schedule your runs
Now, a price monitoring script wouldn’t be very effective unless it ran on a schedule, automatically checking the product’s price and notifying us when it drops below the threshold.
Since our Actor is already deployed on Apify, scheduling it to run, say, every hour, is incredibly simple.
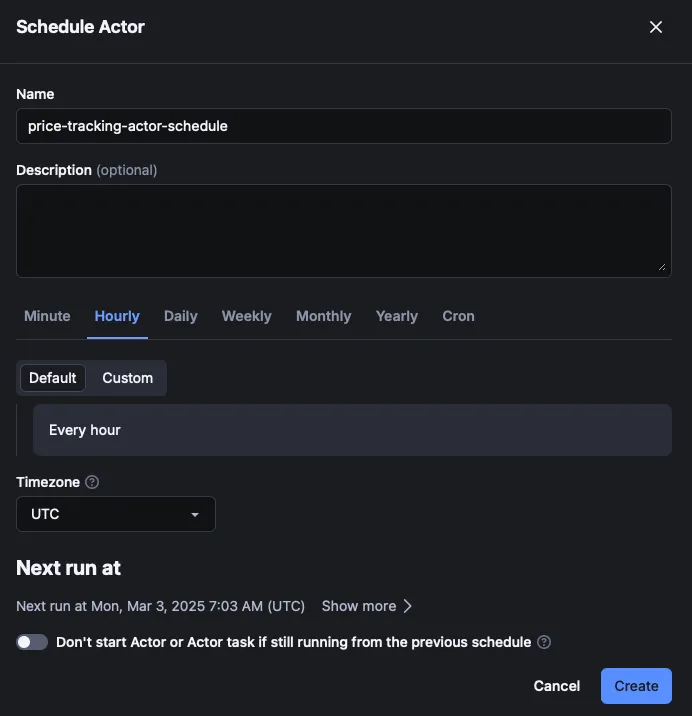
On your Actor page, click the three dots in the top-right corner of the screen and select “Schedule Actor.”
Next, choose how often you want your Actor to run, and that’s it! Your script will now run in the cloud, continuously monitoring the product’s price and sending you an email notification whenever it goes on sale.
That’s a wrap!
Congratulations on completing this tutorial! I hope you enjoyed getting your feet wet with Crawlee and feel confident enough to tweak the code to build your own price tracker.
We’ve only scratched the surface of what Apify and Crawlee can do. As a next step, join our Discord community to connect with other web scraping developers and stay up to date with the latest news about Crawlee and Apify!